
H8fulHuck
H8fulHuck
Shark Pool #3 FBG Home League
Want a Spicier Take? Need a Little Encouragement? Try Changing the Tone of your Report!

H8fulHuck's Redraft Report Card Is Here - Let's Break Down How You Did
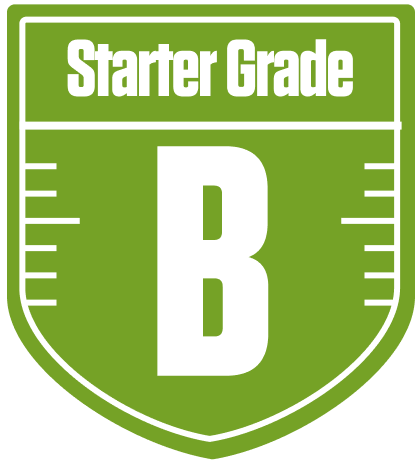
Howdy, H8fulHuck! Welcome to your personalized redraft league report from the Shark Pool 3 FBG Home League. With a solid overall grade of B, you’ve crafted a team that’s got some serious muscle in the backfield but shows a bit of wear and tear at wide receiver and tight end. Your roster construction reflects a savvy bargain hunter’s mindset, especially in the running back room where you’ve landed some true gems.
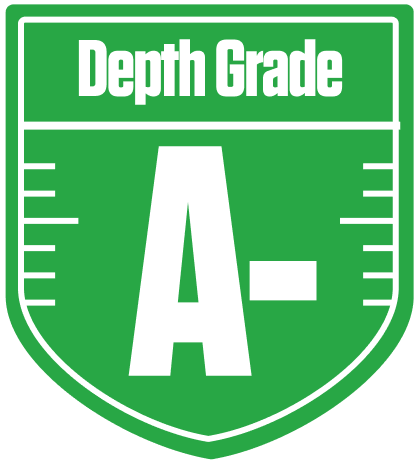
This league’s full PPR scoring and three-flex setup mean depth and versatility are king, and you’ve done well to stockpile quality bench options, especially at RB and defense. Your playoff chances hover around the middle of the pack, so there’s room to maneuver but no time to rest on your laurels. We’ll dig into your team’s strengths, weaknesses, and strategic moves to help you push into that top tier.
Keep an eye on bye week conflicts and positional depth, as these could be the difference-makers down the stretch. We’ll also highlight some key players who are outperforming their draft cost and some who might be holding you back. Let’s get into the nitty-gritty and see how H8fulHuck can turn this good team into a great contender!
Your Grades By Position
Quarterback


Running Back
Wide Receiver

Tight End

Team Defense

Quarterback
Running Back
Wide Receiver
Tight End
Team Defense
Playoff Chances
{"type":"doughnut","data":{"labels":["Make the Playoffs","Miss the Playoffs","Make the Playoffs","Miss the Playoffs","Make the Playoffs","Miss the Playoffs"],"datasets":[{"label":"Great Management","data":[69,31],"backgroundColor":["#3b82f6","#6c757d"],"borderWidth":3,"borderColor":"#fff"},{"label":"Good Management","data":[60,40],"backgroundColor":["#22c55e","#6c757d"],"borderWidth":3,"borderColor":"#fff"},{"label":"Average Management","data":[49,51],"backgroundColor":["#fbbf24","#6c757d"],"borderWidth":3,"borderColor":"#fff"}]},"options":{"responsive":true,"maintainAspectRatio":false,"backgroundColor":"transparent","cutout":"40%","plugins":{"legend":{"display":false},"tooltip":{"enabled":true,"backgroundColor":"rgba(0,0,0,0.8)","titleColor":"#fff","bodyColor":"#fff"}},"elements":{"arc":{"borderWidth":3,"borderColor":"#fff"}}}}
Position Upside Potential
Breakout potential by position - more stars indicate greater upside opportunity