
BarackDHouse LG3
BarackDHouse LG3
Shark Pool #3 FBG Home League
Want a Spicier Take? Need a Little Encouragement? Try Changing the Tone of your Report!
BarackDHouse LG3 Draft Report Card - Shark Pool 3 FBG Home League Breakdown
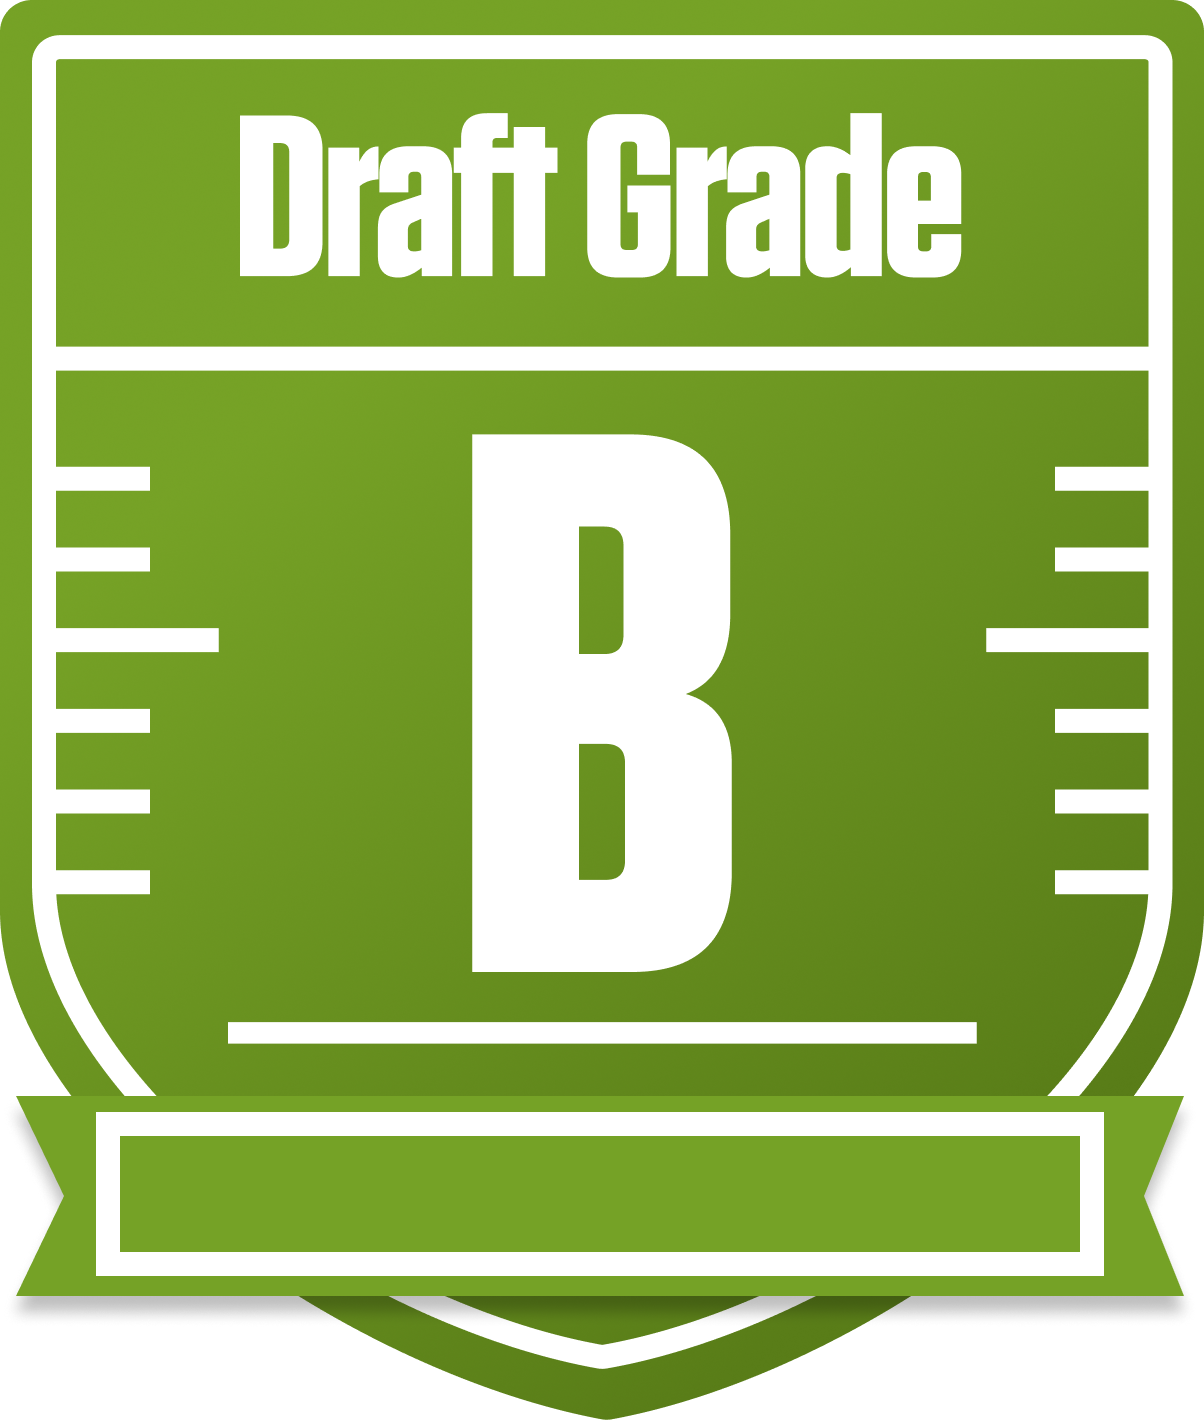
Howdy, BarackDHouse LG3! You’ve got yourself a solid B-grade squad in this 12-team, full PPR redraft league, and that’s nothing to sneeze at. Your team’s overall grade reflects a well-rounded roster with some clear strengths and a few areas that could use a little polish. With one QB, two RBs, two WRs, one TE, a team defense, and three flex spots, your roster construction fits the league’s standard setup, but the devil’s in the details.
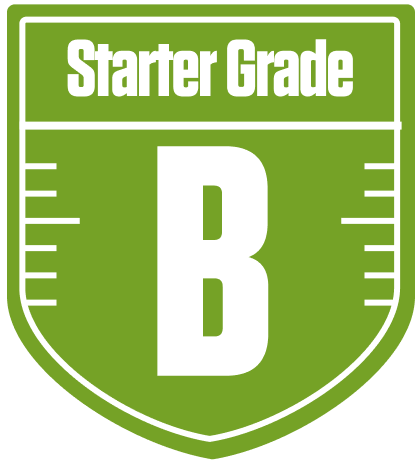
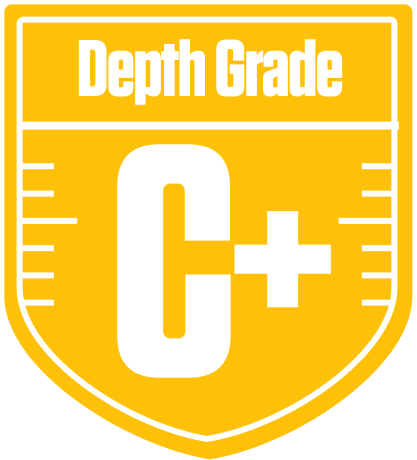
Your starters are holding strong with a B overall grade, especially shining at tight end with an A+—that’s a real edge in a league where TEs can be a difference-maker. However, your running back starters are struggling with an F grade, which could be a real thorn in your side come crunch time. Your wide receivers are decent but not spectacular, sitting at a C+ for starters. Bench depth is a mixed bag, with some bright spots but also some real duds, especially at QB and WR.
Playoff chances hover around the middle of the pack, with an average shot at 47%, a good chance at 58%, and a great chance at 68%. That means you’re in the hunt but need to keep sharpening your roster. We’ll dive into some strategic recommendations below, including some free agent pickups and trade ideas to help you push this team from solid to scary. Let’s break down where you’re winning, where you’re vulnerable, and how to maximize your chances in this Shark Pool.
Your Grades By Position
Quarterback


Running Back
Wide Receiver


Tight End
Team Defense

Quarterback
Running Back
Wide Receiver
Tight End
Team Defense
Playoff Chances
{"type":"doughnut","data":{"labels":["Make the Playoffs","Miss the Playoffs","Make the Playoffs","Miss the Playoffs","Make the Playoffs","Miss the Playoffs"],"datasets":[{"label":"Great Management","data":[68,32],"backgroundColor":["#3b82f6","#6c757d"],"borderWidth":3,"borderColor":"#fff"},{"label":"Good Management","data":[58,42],"backgroundColor":["#22c55e","#6c757d"],"borderWidth":3,"borderColor":"#fff"},{"label":"Average Management","data":[47,53],"backgroundColor":["#fbbf24","#6c757d"],"borderWidth":3,"borderColor":"#fff"}]},"options":{"responsive":true,"maintainAspectRatio":false,"backgroundColor":"transparent","cutout":"40%","plugins":{"legend":{"display":false},"tooltip":{"enabled":true,"backgroundColor":"rgba(0,0,0,0.8)","titleColor":"#fff","bodyColor":"#fff"}},"elements":{"arc":{"borderWidth":3,"borderColor":"#fff"}}}}
Position Upside Potential
Breakout potential by position - more stars indicate greater upside opportunity